Disclaimer: As an Amazon Associate, I earn from qualifying purchases at no extra cost to you.
Intro
A Power Station Fix starts with one clear goal: getting your unit charging again as fast as possible. Your power station sits dead, with no light, no sound, and no rising number on the screen, and that silence can feel alarming when you were counting on it for backup power or a trip.
The good news is that most charging problems have a simple, identifiable cause rather than a mysterious internal failure. This guide walks through 15 real reasons a power station stops charging, along with a clear fix for each, so you can test your unit today without any special tools or technical background.
It works for EcoFlow, Anker, Jackery, Bluetti, and Pecron units, since the underlying charging logic stays mostly the same across brands. Grab your unit and its cable, find a flashlight and a multimeter if you own one, and work through each Power Station Fix step below in order.
Tools You Might Need
A few simple tools can make this Power Station Fix process faster, though none are strictly required. A multimeter helps test cables and fuses, a flashlight makes port inspection easier, and compressed air clears out dust and debris quickly.
Isopropyl alcohol and cotton swabs handle corrosion well, and a second charging cable is useful for quick comparison testing. Having these on hand turns guesswork into a clear diagnosis rather than a frustrating trial-and-error process.

In This Article
| Section | Quick Summary |
|---|---|
| Cable and Port Checks | Test your cable first. Clean the port next. |
| BMS Protection | Learn why your battery blocks charging on purpose. |
| Power Source Tests | Rule out your wall outlet or car port. |
| Firmware and App Bugs | Update your app to fix hidden glitches. |
| Solar Charging Issues | Match your panel voltage to the MPPT window. |
| Battery Health Loss | Spot real capacity loss versus a simple fault. |
| Pro Fix Box | One trick that saves most dead units. |
| FAQs | Fast answers to common charging questions. |
Power Station Fix Step 1: Check Your Cable and Port First
Most charging problems start with the cable, so this Power Station Fix step always comes first. A weak or undersized cable simply cannot carry enough power, which means the unit charges far too slowly or doesn’t seem to charge at all.
Check your cable’s rated wattage and make sure it matches or exceeds your station’s maximum input. Always try the original cable first, since third-party replacements often use slightly different pin layouts, especially for proprietary connectors.
If you own a multimeter, set it to continuity mode and touch the probes to each end of the cable. No beep or reading means the wire is broken internally and needs replacing.
Once the cable checks out, look inside the port using a flashlight for a clear view. Watch for bent pins, a greenish or white corrosion residue, or simple packed-in dust, since a charging port takes real mechanical stress over its lifetime.
Never poke the port with anything metal, as this can bend the pins further and cause more damage. Instead, use short bursts of compressed air to clear loose dirt, and for corrosion, a cotton swab barely dampened with 90%+ isopropyl alcohol works well.
Let the port dry completely before plugging in your charger again.
Power Station Fix Step 2: Understand Your Battery Management System
Every power station relies on a Battery Management System, or BMS, a small chip that guards the battery cells and has full authority over whether charging happens at all. This means the BMS sometimes blocks charging entirely, and that is not always a sign of a fault.
It’s often the system protecting itself from three main dangers: excessive heat, extreme cold, and over-discharge. If your battery has dropped too low, the BMS locks out normal charging current until a safe recovery process can bring the voltage back up.
So how do you know you’re dealing with a BMS lockout rather than a hardware fault? Typically, the unit ignores every power source you try, yet it still feels normal to the touch, with no burning smell or unusual noise.
In that case, let it sit at room temperature for about 30 minutes and try charging again. It also helps to start with a low-power source, such as a small 5V USB charger, for 15 to 20 minutes before switching to your normal, faster charger.
Not all power stations use the same battery chemistry, and that changes how this Power Station Fix step plays out. Li-ion cells charge quickly but are more sensitive to deep drain and heat, while LiFePO4 cells last longer and charge more safely, though they still need adequate warmth to start.
Check your manual to see which chemistry powers your unit, and keep in mind that LiFePO4 units often have a slower recovery mode that can look alarming but is completely normal.

Quick Comparison: Common Charging Ports
| Port Type | Best For | Common Brands |
|---|---|---|
| Barrel Connector | Small, low-watt units | Jackery, Bluetti (entry models) |
| XT60 Connector | Solar and mid-range units | EcoFlow, Pecron |
| Anderson Powerpole | High-current DC charging | EcoFlow Delta Pro, large systems |
Power Station Fix Step 3: Test Your Power Source, Not Just Your Unit
Sometimes the real problem sits outside your power station entirely, so it’s worth ruling this out early. Plug a lamp or a phone charger into the same outlet; if that fails too, the outlet is the actual culprit.
Long or thin extension cords cause real problems too, since a thin 16-gauge cord stretched across 20 feet can create a significant voltage drop for a high-wattage station. It’s best to avoid extension cords unless the cord is properly rated for the load.
GFCI outlets, the kind with “Test/Reset” buttons found in kitchens and bathrooms, can trip under the sudden inrush current a power station draws. Try a standard outlet instead if one is available, and check your circuit breaker panel in case a tripped breaker has cut power to that room.
If you’re using a UPS device or a power strip, bypass them and plug directly into the wall. Some UPS units output a modified sine wave that confuses power station chargers, causing the same symptoms as a dead outlet.
Power Station Fix Step 4: Update Firmware and Fix App Bugs
Firmware quietly controls how your battery behaves, and outdated firmware is a surprisingly common cause of small, confusing glitches. Open your brand’s app and check for a pending update, connecting through Bluetooth or WiFi and following the prompts carefully.
Never unplug the unit mid-update, since an interrupted update can cause a larger fault than the one you started with. If pairing fails, move closer to the unit, since Bluetooth range drops fast through thick walls, or switch to a mobile hotspot if a WiFi update keeps stalling.
If updating doesn’t help, try a full restart by holding the power button for about ten seconds. This forces a system reset and clears many small bugs, though it may also reset some of your saved settings.
It’s also worth checking the app for specific error codes, since each brand publishes its own list online. Searching your exact model number alongside the code will usually point you straight to the real fault.
Power Station Fix Step 5: Solve Solar Charging Problems
Solar charging failures usually come down to a voltage mismatch rather than a lack of sunlight. Check your panel’s voltage output and make sure it falls inside your unit’s MPPT window, because a panel that produces too little voltage simply cannot trigger the controller.
Cloud cover, panel angle, and even light dust or pollen on the glass all cut into your charging speed more than most people expect. Aim your panel directly at the sun, adjust it every few hours if you can, and wipe the panel down with a soft cloth regularly.
Loose solar connections are another frequent culprit, so inspect your XT60 or other connectors and push each one in firmly until it clicks solidly into place. It’s also worth checking your panel’s rated wattage against your needs, since a 100W panel simply cannot replace a 400W panel.
Adding a second panel in the correct series or parallel configuration, following your manual’s wiring diagram, can meaningfully boost your total input. Keep in mind that morning and evening sun sits at a lower angle, so expect slower charging during those hours, with midday sun giving the strongest window.
Pro Fix Box: The Trickle Charge Trick
Deeply drained units often refuse fast charging outright, so it’s worth trying a gentler approach first. Plug in a small 18W to 30W USB-C charger and let it run for about 20 minutes; this slowly wakes a locked BMS without stressing the depleted cells.
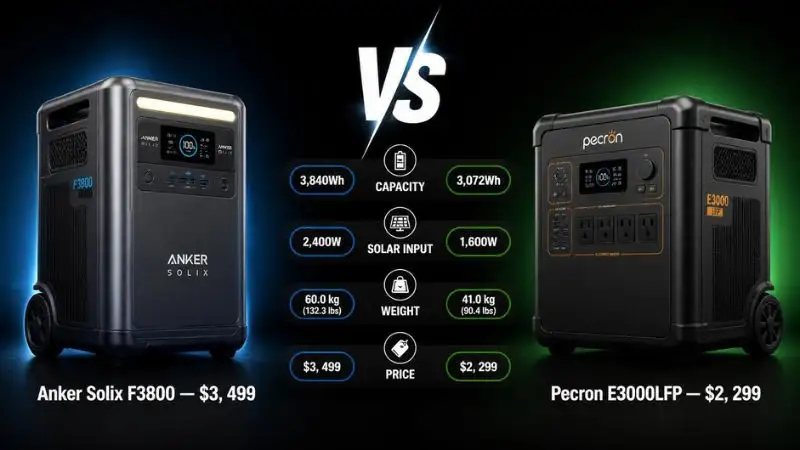
If your troubleshooting steps reveal that your older unit is suffering from permanent battery degradation or you simply need a heavy-duty, ultra-reliable upgrade, it might be time to switch to a top-tier model. For robust home backup and fast charging, we recommend checking out the Anker SOLIX C2000 Gen 2.
👉 [Check Price and Availability for Anker SOLIX C2000 Gen 2 on Amazon]
Avoid forcing a fast charger onto a dead unit right away, since this can trip additional safety locks and make recovery take even longer. Try to charge in shade rather than direct heat, since room temperature charging consistently performs best and protects your battery’s long-term health.
Common Power Station Fix Mistakes to Avoid
Several small habits tend to make charging problems worse before people even realize what’s happening. Forcing your fastest charger onto a deeply drained battery can trip extra safety locks and slow down recovery, so it’s better to start slow and build up.
Skipping the app and guessing at the problem also wastes time, since error codes usually point directly to the actual fault. Charging in direct sunlight or heat feels harmless in the moment, but it stresses the cells and actually slows charging down.
Using a cable “because it fits” is another common trap, since many cables share the same plug shape but carry very different power levels. Opening the unit yourself too soon almost always voids the warranty, so it’s worth calling support first, since a trained technician can often repair the unit for free.
Power Station Fix Storage Tips for Every Season
Good storage habits prevent a large share of charging problems before they ever start. Storing your unit at 50 to 80 percent charge, rather than completely full or empty, puts far less stress on the lithium cells.
It also helps to recharge the unit to around 50 percent every three months, since batteries slowly lose charge even while sitting unused. A simple calendar reminder keeps the BMS ready whenever you need the unit again.
Garages and car trunks are worth avoiding for long-term storage, since they swing between extreme heat and cold that stresses the cells. A closet or cabinet indoors, with a stable room temperature, is a much better home for your unit, and keeping the original box and cables helps with future warranty claims.
When a Power Station Fix Needs Professional Support
DIY troubleshooting solves most charging problems quickly, but a few situations genuinely call for professional help rather than continued tinkering. You should call support if your unit is still under warranty, if you notice any burning smell or smoke, or if the casing looks swollen or cracked.
A very low State of Health reading also deserves a support call, as does a situation where several fixes from this guide have already failed. A quick call is worth the time, since it protects your warranty and often gets the unit repaired for free.
More Power Station Fix Causes to Check
Ten causes cover most of the charging problems people run into, but five more still catch users off guard, along with a few extras worth knowing about.
6. A Blown Internal Fuse
Power surges can blow this small internal component and stop all charging instantly, even though the unit may otherwise appear completely dead. Before opening anything, check whether your unit is still under warranty, since opening a sealed unit almost always voids coverage.
If the warranty has expired, you can test the fuse yourself with a multimeter in continuity mode. Note the exact amperage rating before removing it, and never install a higher-rated replacement, since that removes the very protection the fuse was designed to provide.
7. Extreme Temperature Exposure
Cars and garages swing between very hot and very cold conditions that confuse lithium cells. Never store your unit in a hot trunk, and if it has gotten cold, let it warm up slowly indoors for at least an hour before charging.
Sudden heat can cause condensation, and moisture inside a port can lead to a short circuit. Summer campers should also keep their units shaded rather than in direct sun during the day.
8. A Faulty AC Adapter or Brick
The wall brick can fail before the power station itself does, so it’s worth testing it separately with a different adapter of the same rating to isolate the real fault. Most bricks include a small status LED, and one that feels unusually hot may be failing.
9. Loose Internal Connections
Drops and rough handling during travel can loosen internal wires, causing random and inconsistent charging failures. If your unit fell recently, this is worth suspecting, especially if shaking the unit seems to change its behavior.
That pattern strongly suggests a loose wire rather than a simple fault, and it’s best left to a repair shop rather than opening the case yourself.
10. Simultaneous Charge and Discharge Conflict
Charging while also running heavy devices from the unit, sometimes called pass-through mode, can confuse some models. Unplugging all connected devices and letting the unit charge on its own usually resolves this.
It’s worth checking your manual too, since some budget models don’t fully support true pass-through charging, and running something like a fridge or heater during charging tends to trigger this fault most often.
11. Real Battery Degradation
Real battery degradation reflects normal, expected aging rather than a fixable fault. Checking your State of Health in the app will show this clearly, and anything below 80 percent means real capacity loss that no cable, port, or firmware fix can reverse.
Most brands offer a battery swap service that costs less than buying an entirely new unit, so it’s worth tracking your State of Health every few months.
12. Car Charger Amperage Mismatch
Standard 12V cigarette lighter ports typically cap out around 8 to 10 amps, which limits charging speed considerably compared to AC power. It’s also worth checking your car’s fuse box, since a blown fuse cuts all 12V power, and older vehicles sometimes have weaker circuits that slow charging further still.
13. Corroded Battery Terminals
Corroded terminals, caused by slow moisture exposure over time, can quietly block a clean electrical connection. Cleaning them gently with alcohol and letting them dry fully before use usually resolves this.
People in coastal or humid climates should check their terminals monthly, since a small dab of dielectric grease afterward helps prevent the corrosion from coming back.
14. App or Display Calibration Bugs
Occasionally the unit charges fine, but the display shows the wrong number. Checking the actual output with a separate device confirms whether this is really a display issue.
A firmware update usually resolves it, and if not, uninstalling and reinstalling the app often clears the glitch, with a support call as a backup option.
15. Manufacturing Defects
Manufacturing defects do occasionally slip through on brand-new units, and this is genuinely not something you did wrong. If a new unit fails, contact support immediately and request a replacement, keeping your receipt and original box handy.
It’s worth testing any brand-new unit within its first week of ownership, since early testing catches defects before the return window closes.
Brand-Specific Power Station Fix Notes
Each brand handles charging in slightly different ways, so a few extra notes can help depending on what you own. EcoFlow units typically use X-Stream fast charging, so it’s best to stick with the official EcoFlow brick, and the EcoFlow app shows detailed error codes under its “Device Info” tab.
Anker SOLIX units often include a dedicated recovery mode, triggered by holding the power button for ten seconds, and the Anker app also tracks cycle count. Jackery units favor simple barrel connectors on their smaller models, which makes cable damage a particularly common cause of trouble.
Bluetti units often support dual AC-and-solar charging simultaneously, which is convenient but draws more total power, so it’s worth checking your combined input rating. Pecron units favor XT60 solar connectors across most of their lineup, and the Pecron app shows real-time voltage that’s genuinely useful for fine-tuning your solar panel’s angle.
Power Station Fix Checklist Before You Call Support
Before calling support, it’s worth working through this checklist in order, since it saves time for everyone involved: try the original cable and a second cable, inspect the port for dust or bent pins, and test a different wall outlet while avoiding GFCI types.
Also wait 30 minutes at room temperature, try a slow trickle charge with a small USB-C brick, and check the app for firmware updates and error codes. Confirm your solar panel voltage matches the MPPT window, check State of Health for real degradation, remove all connected devices during charging, and note any smell, swelling, or unusual sound.
Most people find their answer within the first five steps of this Power Station Fix checklist.
FAQs About Power Station Fix Solutions
| Question | Answer |
|---|---|
| Why won’t my power station charge at all? | A Power Station Fix often starts with the cable. Test it first with a multimeter, and also check the port for dust or bent pins. |
| Is it safe to charge overnight? | Yes, most units stop charging at 100% automatically as part of the BMS design. Still, place the unit on a hard surface, away from bedding. |
| Why does my solar panel charge so slowly? | Low voltage is the top cause, and a proper Power Station Fix checks your MPPT window. Cloud cover and panel angle also matter. |
| Can cold weather stop charging completely? | Yes, most lithium cells refuse charging below freezing, so warm the unit first, then try a slow trickle charge. |
| When should I replace the battery instead of fixing it? | If State of Health drops below 80%, replacement beats any Power Station Fix attempt at repair. |
| How long should a normal full charge take? | This depends on your input wattage and battery size, so check your manual for exact expected times. |
| Can I use a laptop charger on my power station? | Only if the voltage and connector match exactly, since a mismatched charger can trip the BMS. |
- If troubleshooting fails and your power station needs a replacement, investing in a reliable, high-capacity unit like the [Anker SOLIX C2000 Gen 2 on Amazon] ensures you won’t get caught off-grid without power again.
Conclusion
A dead power station feels stressful at first, but most causes behind it have simple, manageable fixes once you know where to look. Start with your cable and port, then move on to checking your power source, and remember that your BMS is often protecting the battery on purpose.
A proper Power Station Fix saves both money and time while avoiding needless warranty claims, and good storage habits go a long way toward preventing these problems before they start. Keep this Power Station Fix checklist handy for next time, since charging problems rarely repeat once fixed properly.
So which cause matches your situation best today?