In This Article
- Step 1: Energy Audit & Load
- Step 2: Solar Panel Selection
- Step 3: Inverter Technology
- Step 4: Battery Storage Focus
- Step 5: Wiring & DC Safety
- Global Safety Standards
- Step 6: Earthing & Grounding
- Step 7: Mounting & Tilt Angle
- Step 8: Hiring Experts vs DIY
- Step 9: Testing & ROI
- Step 10: Long-Term Maintenance
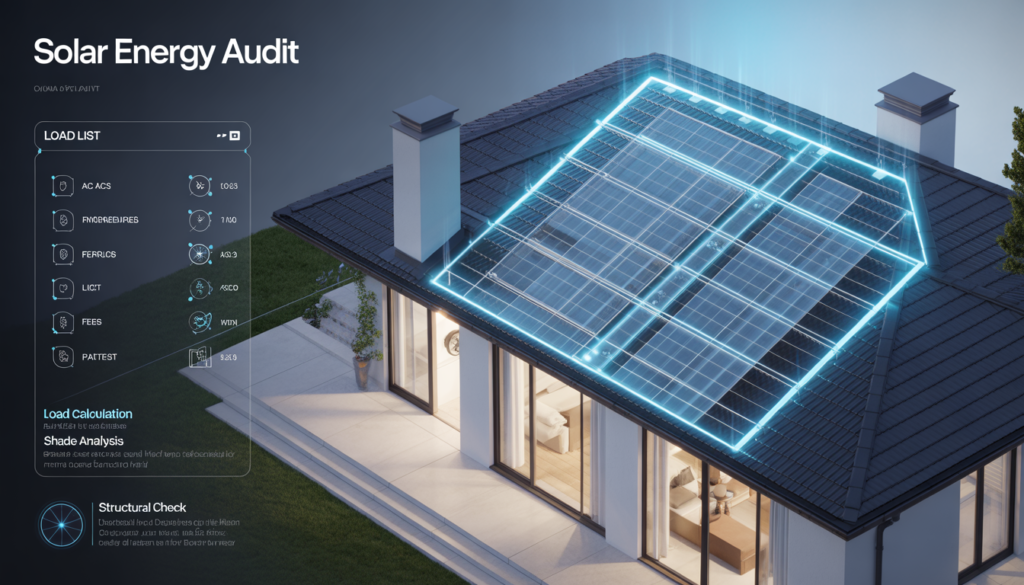
Step 1: Energy Audit and Solar Installation Feasibility
Initially, you must understand your home’s energy appetite before buying panels. A successful Solar Installation starts with a precise energy audit. Most homeowners skip this vital step and regret it later. However, calculating your load ensures your system never fails you. Consequently, you save money by not over-sizing or under-sizing your equipment.
Assessing Your Current Power Consumption
Firstly, gather your utility bills from the last twelve months. This data reveals your peak usage during the hot summer months. Additionally, look for the “Units Consumed” or “kWh” section on each bill. You must identify the highest monthly consumption to plan effectively. Therefore, your Solar Installation will handle your heaviest cooling loads with ease.
Furthermore, list every appliance you plan to run on solar power. Each device has a specific wattage rating found on its back label. For example, a standard ceiling fan uses about 80 watts. In contrast, an inverter air conditioner might pull 1,500 watts initially. Consequently, knowing these numbers prevents system overloads and inverter trips.
How to Size Your Home for Solar Installation
Additionally, you need to categorize your appliances into two main groups. The first group includes “Continuous Loads” like lights and refrigerators. Meanwhile, the second group consists of “Heavy Loads” like pumps and ACs. Moreover, managing these loads determines the size of your Solar Installation. Most experts suggest adding a 20% safety margin to your total.
Consequently, if your total calculated load is 4kW, aim for 5kW. This buffer accounts for energy losses in wires and inverters. Furthermore, consider your future needs before finalizing the system size. Perhaps you plan to buy an Electric Vehicle next year. Therefore, designing a scalable Solar Installation now saves huge upgrade costs later.
Evaluating Roof Health and Space
However, a great system needs a solid foundation to sit on. You must inspect your roof for structural integrity and shading. Initially, check if your roof can support the heavy mounting frames. Additionally, ensure there is enough square footage for the required panels. A standard 550W panel needs about 27 square feet of space.
Furthermore, identify any shadows from nearby trees or tall buildings. Shadows act as the greatest enemy of a Solar Installation. Even a small shadow on one panel can drop the output. Consequently, use a “Sun Path” app to track solar movement. This ensures your panels get direct sunlight for at least six hours.
Load Estimation and System Sizing Table
To help you visualize, use this comparison table for common setups.
| Appliance Set | Estimated Total Load | Recommended System | Best For |
| 5 Fans, 10 LED, 1 Fridge | 1.5 kW – 2 kW | 3kW Solar Installation | Small Apartments |
| 8 Fans, 20 LED, 1 AC | 4 kW – 5 kW | 6kW Solar Installation | Medium Family Homes |
| 10 Fans, 2 ACs, 1 Pump | 8 kW – 10 kW | 12kW Solar Installation | Large Luxury Villas |
Technical Surge Power Management
Initially, some motors require triple their running power just to start. This is known as “Surge Power” or “Starting Current.” Consequently, your inverter must be strong enough to handle this brief spike.
Pro Fix: The 3x Surge Rule
To calculate the required inverter capacity, multiply the wattage of your largest motor (like a water pump) by three. Always ensure your Solar Installation inverter has a high “Peak Power” rating to prevent shut-offs during motor startups. Use a Clamp Meter to measure actual startup amps for 100% accuracy.
Understanding Sunlight Availability
Additionally, you must realize that daylight hours do not equal “Peak Sun Hours.” Peak hours represent the time when sunlight intensity is 1,000 watts per square meter. Furthermore, most regions receive only 4 to 5 peak hours daily. Consequently, this determines how much energy your Solar Installation generates each day.
Did You Know?
A roof facing South (in the Northern Hemisphere) captures up to 20% more energy than an East or West facing roof. This simple alignment can make or break your Solar Installation ROI!
Finalizing the Audit Phase
Therefore, completing this audit is the bedrock of your energy freedom. You now know your load, your roof’s health, and your sun potential. Additionally, you have avoided the trap of guessing your system size. Consequently, the next step involves selecting the actual hardware for your Solar Installation.
Moreover, keep your audit notes handy for the next phase. You will need these numbers to choose the right battery chemistry. Furthermore, accurate data ensures your wiring is thick enough for the current. Therefore, take your time with this energy audit to ensure perfection.
STEP 2: Selecting Elite Panels for Your Solar Installation
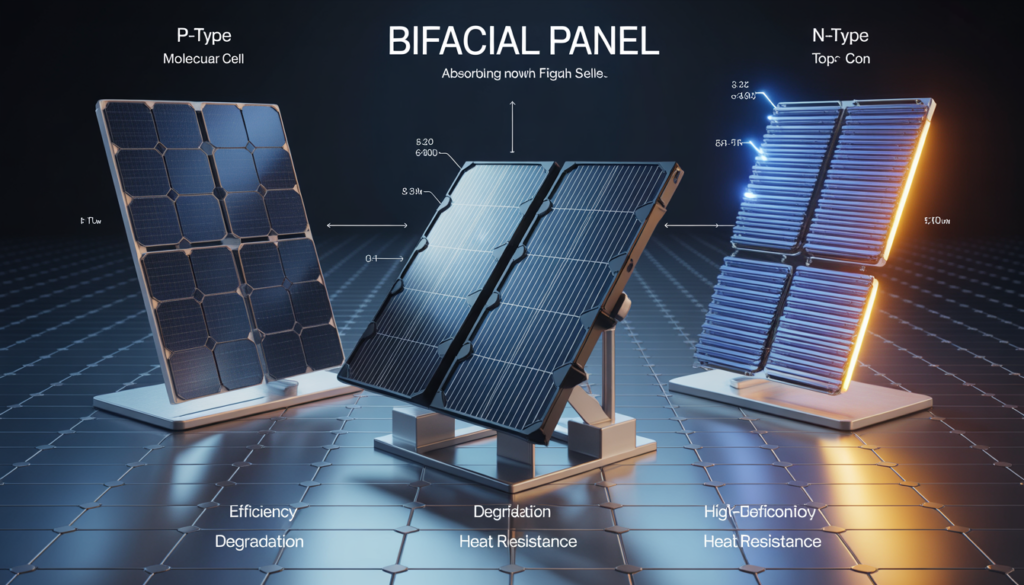
Firstly, choosing the right panels determines your system’s long-term success. Technology moves fast in the renewable energy sector. Moreover, the market now offers diverse options like N-Type and Bifacial. Understanding these differences ensures a high-yield Solar Installation. Therefore, you must look beyond the price tag.
Decoding Modern Panel Technologies
Initially, you should compare N-Type and P-Type silicon cells. P-Type cells were the industry standard for many years. However, N-Type cells now lead in efficiency and durability. Additionally, N-Type panels handle high temperatures much better than older models. Consequently, they produce more electricity in hot climates.
Furthermore, consider the physical build of your chosen modules. Monocrystalline panels offer the best space-to-power ratio today. Additionally, Bifacial panels capture sunlight from both the front and back. Therefore, they work best on reflective roofs or ground mounts. This choice significantly impacts your Solar Installation output.
Selecting High-Efficiency Panels for Solar Installation
Moreover, efficiency ratings tell you how much sunlight becomes electricity. Most high-end panels now exceed 22% efficiency. Firstly, check the data sheet for the “Temperature Coefficient.” A lower number means better performance during summer peaks. Consequently, your Solar Installation stays productive even in extreme heat.
Additionally, pay close attention to the degradation rates over time. Standard panels lose about 0.5% of their power every year. However, premium N-Type modules degrade much more slowly than that. Therefore, you get more value over 25 years. Proper selection ensures a robust and reliable Solar Installation.
Panel Technology Comparison Matrix
Use this table to compare the three most popular panel types.
| Feature | P-Type Mono Perc | N-Type (TOPCon) | Bifacial Mono |
| Efficiency | 20% – 21.5% | 22% – 24% | 21% – 23% |
| Heat Tolerance | Moderate | Excellent | High |
| Best Use Case | Budget Projects | Limited Roof Space | Reflective Surfaces |
Verifying Genuine Hardware Quality
Firstly, many sellers claim to offer “Tier-1” solar brands. However, Tier-1 refers to financial stability, not just panel quality. Additionally, you must verify the serial numbers on the manufacturer’s website. This step prevents you from buying counterfeit or B-grade modules. Therefore, always demand a formal flash test report.
Pro Fix: Checking Tier-1 Labels
Always scan the QR code embedded under the glass of the panel. Genuine Tier-1 manufacturers like Jinko, Longi, or Canadian Solar link this code to a digital database. If the label is only a sticker on the frame, it might be a fake. Ensure your Solar Installation uses A-grade cells for maximum safety.
Understanding Performance Loss Factors
Additionally, you must understand Light-Induced Degradation, commonly known as LID. LID occurs when panels first face the sun’s rays. Consequently, P-Type panels often lose 2% of power immediately. However, N-Type cells are virtually immune to this specific loss. Therefore, your Solar Installation starts at peak performance from day one.
Did You Know?
LID (Light Induced Degradation) can cause an immediate 2% drop in P-Type panels. N-Type technology uses phosphorus instead of boron, which completely eliminates this problem for your Solar Installation!
Optimizing for Global Climates
Furthermore, your local weather should dictate your panel choice. For instance, snowy regions benefit greatly from Bifacial modules. Additionally, coastal areas require panels with high salt-mist resistance. Therefore, check the certifications, like IEC 61701, before buying. This ensures your Solar Installation survives harsh environmental conditions.
Moreover, look for long-term product and performance warranties. Most top brands offer a 12-year product and a 25-year performance warranty. Consequently, you are protected against manufacturing defects for over a decade. Additionally, high-quality frames prevent micro-cracks during high wind speeds. Therefore, your Solar Installation remains a safe, long-term asset.
Final Hardware Decisions
Finally, prioritize quality over the lowest initial cost. Cheap panels often fail within five to seven years. Moreover, replacing faulty panels involves high labor and transport costs. Therefore, investing in N-Type or Bifacial technology is smarter. Consequently, your Solar Installation provides the cheapest electricity over its lifespan.
Additionally, ensure your installer uses proper handling techniques. Walking on panels creates invisible micro-cracks that kill efficiency. Furthermore, keep the original warranty documents in a safe place. Therefore, you are ready for any future claims or upgrades. This completes the hardware selection for a world-class Solar Installation.
STEP 3: Choosing the Central Brain for Your Solar Installation
Firstly, the inverter acts as the heart of your entire system. It converts raw Direct Current (DC) into usable Alternating Current (AC). Moreover, choosing the wrong type can cripple your energy harvest. Therefore, you must select an inverter that matches your goals. A smart Solar Installation requires a high-efficiency power conversion unit.
Comparing Inverter Types for Maximum Yield
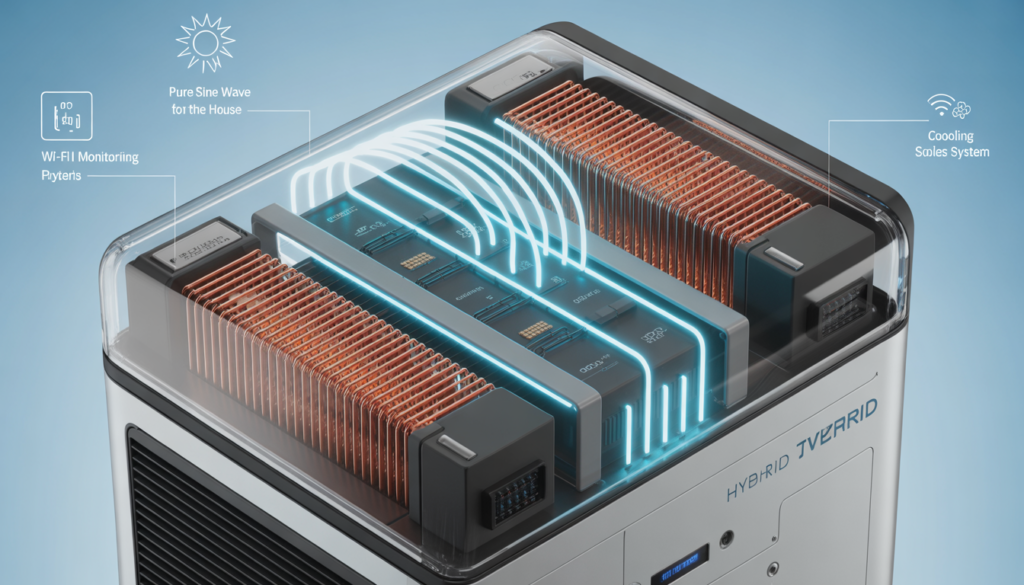
Initially, you must decide between Hybrid, Off-Grid, or String technologies. Hybrid inverters offer the most flexibility for modern homes today. Additionally, they manage both battery storage and grid connectivity simultaneously. Consequently, they are the gold standard for a premium Solar Installation. However, budget-conscious projects might prefer standard string inverters instead.
Furthermore, micro-inverters are gaining popularity for complex roof designs. These small units attach directly to each solar panel. Therefore, a shadow on one panel won’t affect the others. Additionally, they provide granular data for every part of your Solar Installation. Consequently, you gain total control over your energy production.
Why Pure Sine Wave Inverters Matter in Solar Installation
Moreover, the quality of the AC output is absolutely critical. You should only use Pure Sine Wave inverters for electronics. Firstly, these units mimic the smooth electricity provided by utility companies. Therefore, they protect sensitive motors in fridges and air conditioners. A high-quality Solar Installation ensures your home appliances last much longer.
In contrast, modified sine wave inverters produce “choppy” electricity. This rough power can cause humming sounds in your ceiling fans. Additionally, it may eventually burn out the circuit boards in laptops. Therefore, never compromise on wave quality during your Solar Installation. Pure Sine Wave technology is a non-negotiable requirement for safety.
Inverter Technology Comparison Matrix
Use this table to find the best match for your needs.
| Feature | Hybrid Inverters | String Inverters | Micro-Inverters |
| Grid Connectivity | Bi-directional | Single-direction | Single-direction |
| Battery Support | Integrated | External/None | Usually None |
| System Lifespan | 10 – 15 Years | 10 – 12 Years | 20 – 25 Years |
Managing Heat for System Longevity
Firstly, inverters generate significant heat during the conversion process. Electronic components degrade quickly when they operate in high temperatures. Moreover, excessive heat can trigger a “thermal derating” safety mode. Consequently, your Solar Installation will produce less power to cool down. Therefore, proper ventilation is essential for maintaining peak efficiency.
Pro Fix: Inverter Cooling Tips
Install your inverter in a shaded, well-ventilated area at eye level. Ensure at least 6 inches of clearance on all sides for airflow. Additionally, use a soft brush to clean the intake fans every month. A cool inverter adds years to your Solar Installation and prevents sudden shutdowns during peak summer.
Understanding Energy Clipping Losses
Additionally, you might notice your system hitting a “power ceiling.” This phenomenon is known as “Clipping” in the solar industry. Furthermore, it happens when panels produce more power than the inverter. Consequently, the inverter discards the extra energy to protect itself. Therefore, sizing your Solar Installation ratio correctly prevents this wasted potential.
Did You Know?
Clipping losses often occur when your DC panel capacity exceeds your AC inverter rating. While a 1.2:1 ratio is normal, excessive clipping can waste 10% of your Solar Installation energy!
Smart Features and Remote Monitoring
Moreover, modern inverters include built-in Wi-Fi and Bluetooth connectivity. Firstly, download the manufacturer’s official app to track your production. You can see real-time data from anywhere in the world. Additionally, many apps alert you if a fault occurs instantly. Therefore, you can troubleshoot your Solar Installation before problems escalate.
Furthermore, check for “Global Maximum Power Point Tracking” (MPPT) features. Advanced MPPT algorithms find the best voltage for your panels. Consequently, they maximize energy harvest even during cloudy or rainy days. Therefore, smart software is just as important as hardware. This intelligence makes your Solar Installation truly efficient and hands-free.
Protection Standards and Warranty
Finally, ensure your inverter has a high Ingress Protection (IP) rating. An IP65 rating means the unit is water and dust-resistant. Moreover, check the warranty terms for labor and shipping coverage. Most premium brands offer a 5 to 10-year standard warranty. Therefore, you are protected against unexpected electronic failures in your Solar Installation.
Additionally, verify that the inverter meets your local grid regulations. Some countries require specific “anti-islanding” protection for safety during blackouts. Furthermore, high-quality units include built-in surge protection for added security. Consequently, your home remains safe from external electrical spikes. Therefore, a certified inverter is the anchor of a reliable Solar Installation.
STEP 4: Mastering Energy Storage for Your Solar Installation
Firstly, the battery bank defines your independence from the utility grid. It stores excess energy produced during the bright daylight hours. Moreover, choosing the wrong chemistry can lead to frequent replacements. Therefore, understanding battery technology is vital for a sustainable Solar Installation. Most modern homeowners now prioritize longevity over the lowest initial cost.
Comparing Battery Chemistries for Long-Term Use
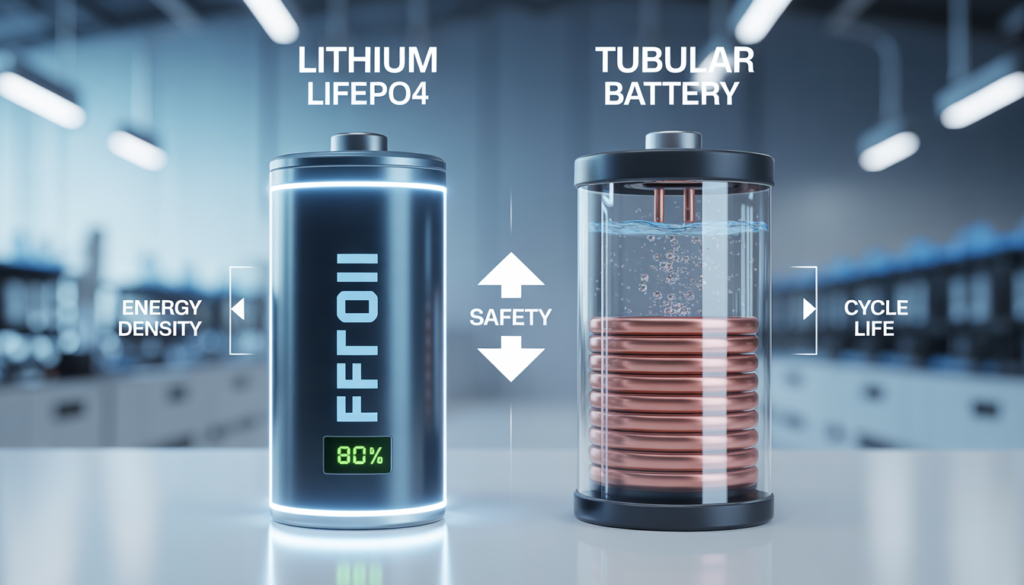
Initially, you must distinguish between Lithium, Tubular, and Dry Cell options. Lithium Iron Phosphate (LiFePO4) is currently the industry leader for efficiency. Additionally, these batteries offer thousands of charge cycles without significant degradation. Consequently, they are the smartest investment for a high-end Solar Installation. However, traditional Tubular batteries remain popular for those on a tight budget.
Furthermore, Tubular lead-acid batteries require regular maintenance and water topping. They are heavy and take up considerable floor space. Therefore, you must plan your storage area carefully before purchase. Additionally, Dry Cell batteries offer a middle ground but lack deep-cycling endurance. Consequently, your choice determines the overall reliability of your Solar Installation during the night.
Choosing the Best Battery Bank for Solar Installation
Moreover, you need to calculate the required “Ampere Hours” (Ah) for your home. Firstly, determine how many hours of backup you need after sunset. You should avoid oversized banks that the sun cannot fully charge. Additionally, undersized banks will deplete too quickly and shorten their lifespan. Therefore, matching battery capacity to your Solar Installation is a balancing act.
Consequently, always check the “C-Rating” of the battery before buying. A higher C-rating allows for faster charging and discharging of energy. Moreover, ensure your inverter settings match the specific battery voltage requirements. Incorrect settings can cause permanent damage to your energy storage. Therefore, professional configuration is essential for a safe Solar Installation.
Battery Lifespan and Depth of Discharge (DOD) Table
Use this detailed comparison to understand the long-term value of each type.
| Feature | LiFePO4 (Lithium) | Tubular (Lead Acid) | Dry Cell (AGM) |
| Typical Lifespan | 10 – 15 Years | 2 – 5 Years | 3 – 5 Years |
| Safe DOD | 80% – 95% | 50% Max | 50% Max |
| Cycle Count | 3000 – 6000 | 500 – 1200 | 400 – 800 |
Extending Battery Life through Smart Habits
Firstly, the way you charge your batteries dictates their ultimate survival. Deep discharges are the primary cause of premature battery failure worldwide. Moreover, extreme heat can accelerate chemical breakdown inside the cells. Consequently, you must keep your storage area cool and dry. Therefore, following manufacturer guidelines protects your Solar Installation investment.
Pro Fix: The 20-80% Charging Rule
To double the life of your Lithium batteries, keep them between 20% and 80% charge. Avoid letting the battery hit 0% or staying at 100% for long periods. Consequently, this reduces chemical stress on the internal cells. Therefore, your Solar Installation will maintain peak storage capacity for many additional years.
Understanding the Risks of Thermal Runaway
Additionally, safety must always come before cost savings in energy storage. Some battery chemistries are prone to a dangerous state called “Thermal Runaway.” Furthermore, this occurs when a cell overheats and triggers a chain reaction. Consequently, the battery can catch fire or even explode if unmanaged. Therefore, always choose batteries with a built-in Battery Management System (BMS) for your Solar Installation.
Did You Know?
Thermal Runaway is much rarer in LiFePO4 chemistry compared to standard Lithium-Ion (NMC). This makes LiFePO4 the safest choice for a residential Solar Installation today!
The Importance of a Battery Management System (BMS)
Moreover, a BMS acts as a digital bodyguard for your lithium cells. Firstly, it monitors the voltage and temperature of every individual cell. It automatically balances the charge to prevent one cell from overworking. Additionally, a good BMS shuts down the system if it detects a short circuit. Therefore, never settle for a lithium battery that lacks a high-quality BMS for your Solar Installation.
Furthermore, some advanced systems allow for remote monitoring via a smartphone app. You can see the health of your battery bank in real-time. Consequently, you can identify a weak cell before the entire bank fails. Additionally, this data helps you optimize your daily energy usage patterns. Therefore, “Smart Storage” is the future of every efficient Solar Installation.
Environmental Impact and Recycling
Finally, consider the environmental footprint of your energy storage choices. Lead-acid batteries contain toxic chemicals that require specialized recycling processes. Moreover, lithium batteries are becoming easier to recycle as technology improves globally. Therefore, choose brands that offer a clear “End-of-Life” disposal or recycling plan. Consequently, your Solar Installation stays green from beginning to end.
Additionally, always store batteries away from direct sunlight or flammable materials. Proper ventilation prevents the buildup of dangerous gases from lead-acid types. Furthermore, use thick, high-quality terminal connectors to prevent energy loss. Therefore, attention to small details ensures a high-performing Solar Installation. This completes the critical phase of planning your energy independence.
STEP 5: Eliminating Hazards Through Professional Solar Installation Wiring
Firstly, the wiring acts as the nervous system of your power plant. It carries high-voltage energy from the roof to your home. Moreover, using the wrong cables is a leading cause of fires. Therefore, safety must dictate your choices during a Solar Installation. Most homeowners ignore the technical specs of wires until something goes wrong.
Why DC Cables Differ from AC Wires
Initially, you must understand the difference between DC and AC. Solar panels produce Direct Current (DC), which behaves differently from household AC. Additionally, DC power travels over long distances with higher resistance. Consequently, using standard AC wires for a Solar Installation is extremely dangerous. Standard wires can melt under the constant pressure of high DC voltage.
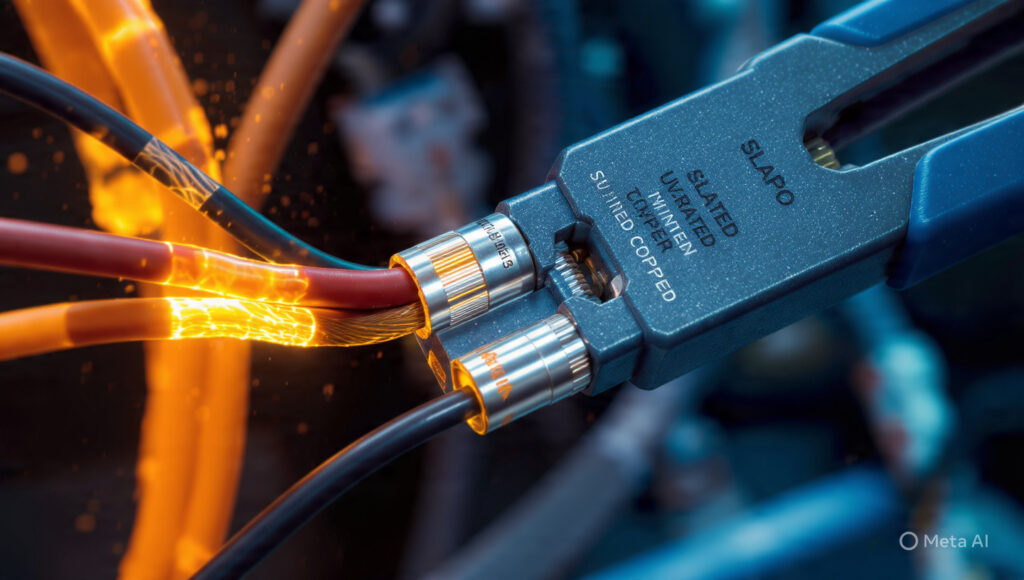
Furthermore, professional solar cables feature double insulation for added protection. These layers prevent electrical leaks even if the outer jacket gets damaged. Therefore, you must insist on tinned copper cables for your system. Additionally, tinned copper resists corrosion much better than bare copper or aluminum. Consequently, your Solar Installation maintains its efficiency for decades without costly wire repairs.
Proper Wiring Standards for a Safe Solar Installation
Moreover, you must follow international electrical codes to ensure a safe setup. Firstly, ensure all outdoor cables are rated for ultraviolet (UV) exposure. Sunlight quickly destroys standard plastic insulation on common household wires. Consequently, exposed wires can crack and cause dangerous short circuits. Therefore, UV-rated cables are a mandatory requirement for any quality Solar Installation.
Additionally, proper cable management keeps your roof organized and secure. You should use stainless steel clips or UV-resistant ties for cables. Avoid letting wires touch the hot roof surface directly. Moreover, run all cables through high-quality conduits or pipes for physical protection. Consequently, rodents or birds cannot chew through your solar installation’s power lines.
Wire Gauge (AWG) vs. Distance Comparison Table
Use this table to select the correct thickness for your cable runs.
| Distance (Feet) | Current (10 Amps) | Current (20 Amps) | Current (30 Amps) |
| 0 – 30 Feet | 12 AWG (4mm) | 10 AWG (6mm) | 10 AWG (6mm) |
| 31 – 60 Feet | 10 AWG (6mm) | 8 AWG (10mm) | 6 AWG (16mm) |
| 61 – 100 Feet | 8 AWG (10mm) | 6 AWG (16mm) | 4 AWG (25mm) |
The Critical Role of MC4 Connectors
Firstly, never join solar wires by twisting them together by hand. You must use specialized MC4 connectors for all panel-to-panel connections. These connectors are waterproof and designed to handle high DC currents safely. Moreover, they provide a secure “click” lock that prevents accidental disconnection. Therefore, MC4 connectors are the gold standard for a professional Solar Installation.
Furthermore, a loose connection creates a high-resistance point that generates intense heat. This heat can eventually start a fire on your roof. Additionally, always use a proper crimping tool rather than standard pliers. Consequently, you ensure a gas-tight connection that excludes moisture and air. Therefore, small parts like connectors define the safety of your Solar Installation.
Pro Fix: Crimping MC4 Connectors
Strip exactly 10mm of insulation from the cable before inserting it into the metal terminal. Use a dedicated Ratchet Crimper to squeeze the terminal until the tool releases automatically. Consequently, this prevents “cold joints” and ensures zero voltage drop. Therefore, your Solar Installation remains cool and efficient under heavy loads.
Understanding and Preventing Voltage Drop
Additionally, long cable runs lead to a phenomenon called “Voltage Drop.” This means energy is lost as heat before it reaches the inverter. Furthermore, a voltage drop of more than 3% is considered a failure. Consequently, you must use thicker wires if your panels are far away. Therefore, calculating the correct “Gauge” is essential for your Solar Installation ROI.
Did You Know?
UV-rated XLPO insulation can withstand temperatures up to 120°C. Standard PVC insulation melts at much lower temperatures, making it a fire hazard for your Solar Installation!
Implementing Overcurrent Protection (DC Breakers)
Moreover, every string of panels needs a dedicated DC circuit breaker. Firstly, these breakers act as a safety switch during an electrical fault. They instantly disconnect the power if the current exceeds safe limits. Additionally, you should install a Surge Protection Device (SPD) near the inverter. Therefore, your Solar Installation stays protected against nearby lightning strikes or grid spikes.
Furthermore, label all your breakers and wires clearly inside the distribution box. This makes future troubleshooting much faster and safer for any technician. Consequently, anyone working on the system knows exactly which switch controls which string. Additionally, use a dedicated DC-rated isolator switch near the solar panels. Therefore, you can safely turn off the power for cleaning or maintenance of your Solar Installation.
Ensuring Waterproof Integrity
Finally, ensure all entries into the house are completely water-sealed. Use “Cable Glands” or weather-head entries to prevent leaks during heavy rain. Moreover, water entering a conduit can cause internal corrosion over time. Therefore, maintaining a “Drip Loop” in the wire is a smart engineering trick. Consequently, gravity pulls rainwater away from the entry point of your Solar Installation.
Additionally, check all electrical terminations after the first month of operation. Heat cycles can sometimes cause screws to loosen slightly in the breakers. Furthermore, use a thermal camera if possible to find “hot spots” in the wiring. Therefore, proactive maintenance prevents minor issues from becoming major disasters. This completes the essential safety phase of your professional Solar Installation.
Global Solar Installation Standards: What Every Professional Must Know
When designing a Solar Installation for a global audience, adhering to international safety and performance standards is not optional—it is a legal requirement. Whether you are in North America, Europe, or Australia, following these protocols ensures your system is insurable and safe for decades.
1. Rapid Shutdown Requirements (NEC 690.12)
In many regions, especially the United States, every Solar Installation must include a “Rapid Shutdown” mechanism. This safety feature reduces the voltage of the solar array to a safe level (under 30V) within 30 seconds of activation.
- Why it matters: It protects firefighters and first responders from high-voltage shocks during an emergency.
- Pro Tip: Use smart inverters or external rapid shutdown devices (RSD) to comply with these global safety laws.
2. International Protection (IP) Ratings
For a global Solar Installation, hardware must survive diverse environments—from the humid tropics to dusty deserts.
- Inverters: Look for a minimum of IP65 (Dust-tight and protected against water jets).
- Connectors: IP68 is the standard for MC4 connectors to ensure they remain waterproof even if submerged briefly during heavy storms.
3. Harmonic Distortion and Grid Compliance (IEEE 1547)
To maintain grid stability, your Solar Installation must produce “Clean Power.”
- THD (Total Harmonic Distortion): High-quality inverters must keep THD below 3%.
- Anti-Islanding: This international standard ensures that if the main grid goes down, your Solar Installation stops feeding power back to the lines, preventing accidents for utility workers.
4. Wind and Snow Load Compliance (IEC 61215)
A global guide must account for extreme weather.
- Snow Loads: In northern climates, panels must be rated for 5400 Pa (Pascal) to handle heavy snow.
- Wind Resistance: Mounting structures should comply with local wind zone maps (e.g., AS/NZS 1170 in Australia).
5. Smart Grid Integration (IoT & V2H)
The future of Solar Installation is digital. Modern global standards now focus on:
- V2H (Vehicle-to-Home): Using your Electric Vehicle (EV) battery as a backup for your house.
- IoT Monitoring: Integrating your system with smart home hubs via Modbus or SunSpec protocols for automated energy management.
Comparison of Global Electrical Standards
| Standard Code | Region | Focus Area |
| NEC (NFPA 70) | USA / North America | Fire Safety & Rapid Shutdown |
| IEC 60364-7-712 | Europe / International | Electrical Installation for PV |
| AS/NZS 5033 | Australia / New Zealand | Installation & Safety Requirements |
STEP6: Securing Your Solar Installation Against Electrical Surges
Firstly, grounding remains the most neglected part of most residential power systems. It provides a safe path for excess electricity to enter the earth. Moreover, a lack of proper grounding can Destroy Your Expensive Inverter and Smart home gadgets instantly.” Therefore, you must prioritize a dedicated earthing system for your Solar Installation. Safety should never be sacrificed for a lower initial project cost.
Constructing a Professional Earthing Pit
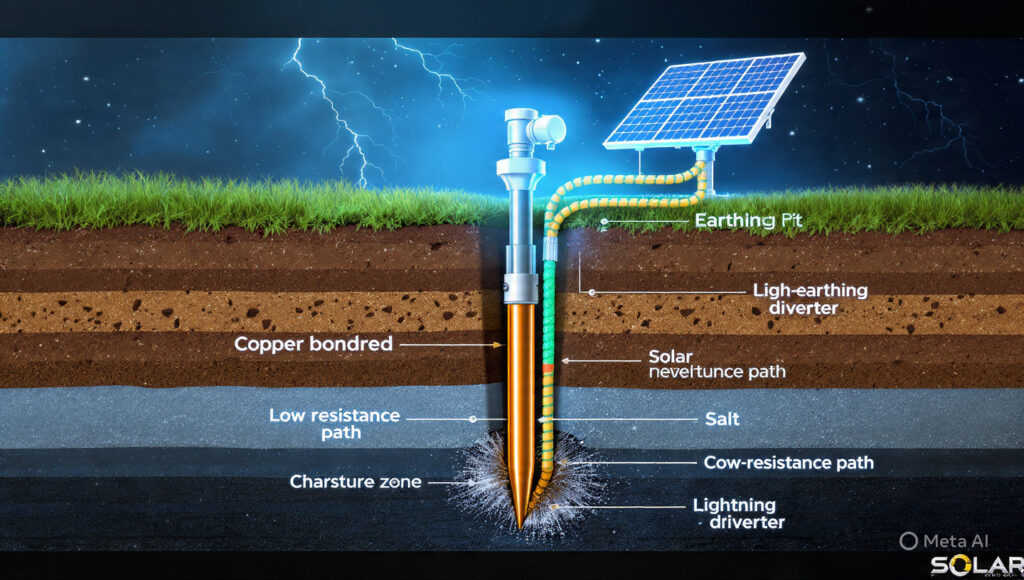
Initially, you must dig a hole at least eight feet deep. This depth ensures the rod reaches moist soil layers for better conductivity. Additionally, use a high-purity copper-bonded steel rod for the core. Consequently, the rod resists corrosion while providing a low-resistance electrical path. Therefore, the earthing pit is the foundation of your Solar Installation safety.
Furthermore, fill the pit with a mixture of charcoal and salt. These materials help maintain moisture and improve the soil’s conductive properties. Additionally, some modern installers prefer specialized chemical earthing compounds for better results. Consequently, these compounds offer a stable resistance value over many years. Therefore, investing in quality pit materials protects your Solar Installation long-term.
Preventing Lightning Damage in Your Solar Installation
Moreover, you must install a Lightning Arrestor (LA) on your roof. This device sits at the highest point of your mounting structure. Firstly, it attracts atmospheric electricity during a storm and diverts it away. Therefore, a lightning strike hits the arrestor instead of your panels. A professional Solar Installation always includes this vital layer of protection.
Additionally, you should use a separate earthing pit for the arrestor. Combining the equipment ground and the lightning ground can be risky. Furthermore, use a thick copper strip or braided wire for the down-conductor. Consequently, the massive energy of a strike travels safely to the ground. Therefore, proper isolation keeps the sensitive electronics of your Solar Installation secure.
Grounding Material Effectiveness Table
Use this table to choose the best materials for your grounding system.
| Material Type | Conductivity Rating | Corrosion Resistance | Best Use Case |
| Pure Copper Rod | Excellent (100%) | High | Professional Solar Installation |
| Galvanized Steel | Fair (10-15%) | Moderate | Temporary or Budget Setups |
| Copper-Bonded Steel | Very Good (40%+) | High | Standard Residential Systems |
Verifying Earth Conductivity Through Testing
Firstly, you must never assume your earthing system is working correctly. You should measure the resistance using a dedicated Earth Resistance Tester. Moreover, the resistance value should stay below 5 Ohms for safety. Consequently, a lower number means a better path for fault current. Therefore, regular testing is a mandatory part of a Solar Installation audit.
Pro Fix: The “Bulb Test” for Earth Health
If you lack a digital tester, use a 100-watt incandescent bulb. Connect one wire to the live phase and the other to your earth wire. If the bulb glows at full brightness, your earthing is likely solid. However, a dim bulb indicates high resistance or poor grounding. Consequently, you must moisten the pit or deepen the rod for a safe Solar Installation.
Understanding Soil Resistivity and Environment
Additionally, the type of soil in your area affects grounding performance. Rocky or sandy soils have very high resistivity and poor conductivity. Furthermore, you may need to install multiple rods in such environments. Consequently, connecting these rods in parallel lowers the overall system resistance. Therefore, geography dictates the complexity of your Solar Installation grounding.
Did You Know?
Soil resistivity changes with the seasons! During dry summers, the earth becomes less conductive. Consequently, pouring water into your earthing pit can restore the safety of your Solar Installation!
Bonding the Mounting Structure
Moreover, you must bond the metal mounting frames to the ground. Firstly, every individual row of panels should have a solid connection. This prevents the metal structure from becoming “live” during a fault. Additionally, use serrated washers to bite through the anodized coating of the frames. Therefore, every metal component of your Solar Installation remains at zero potential.
Furthermore, ensure all grounding connections are tight and free of oxidation. Use anti-corrosion grease on the clamps to prevent rust over time. Consequently, the electrical path remains clear and highly conductive for years. Additionally, inspect these connections annually for any signs of physical damage. Therefore, proactive maintenance is the key to a reliable and safe Solar Installation.
Protecting the DC and AC Sides
Finally, install Surge Protection Devices (SPD) in your distribution boxes. One SPD should protect the DC lines coming from the panels. Moreover, a second SPD should safeguard the AC side connected to the grid. Consequently, your system is protected from both lightning and grid surges. Therefore, a complete protection strategy is the hallmark of a high-quality Solar Installation.
Additionally, verify that your inverter has an internal “Ground Fault” sensor. This feature shuts down the system if it detects current leaking to the ground. Furthermore, this prevents fire hazards and protects users from electrical shocks. Consequently, smart electronics work together with physical grounding for total safety. Therefore, your Solar Installation becomes a truly secure asset for your home.
STEP 7: Engineering the Perfect Foundation for Your Solar Installation
Firstly, the mounting structure acts as the skeleton of your energy system. It must withstand harsh winds and heavy rains for decades. Moreover, the angle of your panels dictates your daily energy harvest. Therefore, you must prioritize structural engineering during a Solar Installation. A weak frame can lead to catastrophic panel failure during storms.
Selecting High-Quality Mounting Materials
Initially, you must choose between Galvanized Iron (GI) and Aluminum structures. GI structures offer superior strength for large-scale residential setups. Additionally, ensure the zinc coating is thick enough to prevent rusting. Consequently, your Solar Installation remains stable and rust-free even in humid climates. However, aluminum is better for coastal areas with high salt spray.
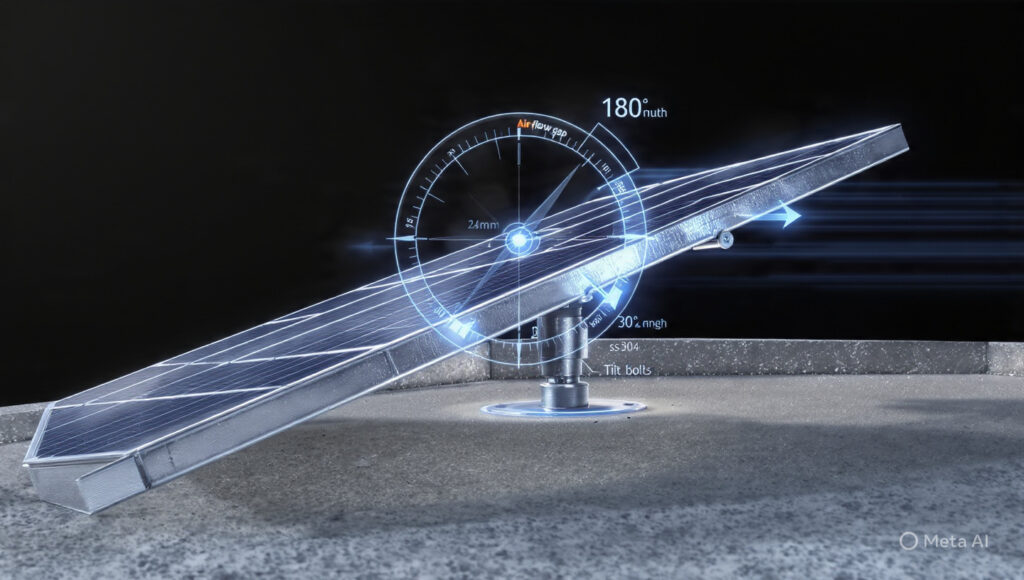
Furthermore, check the thickness of the metal channels used for mounting. Thin frames might sag under the weight of modern 550W+ panels. Therefore, insist on using at least 12-gauge or 14-gauge GI sheets. Additionally, use stainless steel (SS304) bolts to join the different sections. Consequently, you prevent “galvanic corrosion” between different types of metals in your Solar Installation.
Optimal Angles to Maximize Solar Installation Output
Moreover, the “Tilt Angle” is the most critical factor for production. Firstly, your panels should ideally face South in the Northern Hemisphere. This orientation captures the maximum amount of sunlight throughout the day. Additionally, the specific angle depends on your city’s latitude for a Solar Installation. Most experts recommend an angle between 25 and 35 degrees.
Consequently, adjusting the tilt can boost energy production by up to 15%. Furthermore, consider using a seasonal adjustable stand for better results. You can tilt the panels higher in winter and lower in summer. Therefore, your Solar Installation remains optimized regardless of the sun’s position. This proactive approach ensures you get the most out of every sunlight hour.
Seasonal Tilt Angle Comparison Table
Use this table to understand how angles affect your energy yield.
| Season | Ideal Tilt Angle | Sun Position | Energy Impact |
| Summer | Latitude – 15° | High in the Sky | Maximum Daily Units |
| Winter | Latitude + 15° | Low in the Sky | Better Morning Output |
| Year-Round | Fixed Latitude | Average Path | Balanced Performance |
Ensuring Wind Resistance and Roof Integrity
Firstly, solar panels on a roof act like large sails. High winds create massive “uplift” forces that can rip off structures. Moreover, you must use heavy-duty roof anchors to secure the frames. Consequently, the weight of the Solar Installation stays evenly distributed across the roof. Therefore, structural safety should be your primary concern during high-wind seasons.
Pro Fix: Anti-Rust Coating for GI
Even Galvanized Iron can rust at the points where it is cut or drilled. Apply a high-quality “Cold Galvanizing Spray” or Zinc-rich paint to all joints. Additionally, use rubber gaskets between the panel and the metal rail. Consequently, you prevent friction damage and extend the life of your Solar Installation by several years.
Understanding Azimuth and Sun Tracking
Additionally, the “Azimuth” refers to the horizontal direction of your panels. A perfect South alignment is 180 degrees on a compass. Furthermore, even a 10-degree deviation can slightly reduce your total energy harvest. Consequently, professional installers use digital inclinometers for precise alignment during a Solar Installation. Therefore, accuracy during the setup phase leads to long-term financial savings.
Did You Know?
Wind load math is vital! A 100 mph wind can apply over 40 pounds of pressure per square foot. Your Solar Installation must be rated to survive these “uplift” forces to avoid roof damage!
Preventing Roof Leaks During Installation
Moreover, drilling into a concrete or tin roof requires absolute waterproofing. Firstly, use “L-Feet” brackets with high-quality EPDM rubber washers. These washers create a watertight seal that prevents rain from entering. Additionally, apply a layer of chemical weatherproofing around the base of each leg. Therefore, your **Solar Installation” does not compromise the ceiling of your home.
Furthermore, ensure the structure allows for sufficient airflow under the panels. Heat buildup on the roof can reduce panel efficiency by 5% or more. Consequently, maintaining a 4-inch to 6-inch gap is a smart design choice. Additionally, this space makes it easier to clean the roof surface later. Therefore, a well-planned Solar Installation considers both energy and house maintenance.
Finalizing the Structure Audit
Finally, double-check every nut and bolt after the installation is complete. Vibration from the wind can sometimes loosen fasteners over the first month. Moreover, use nylon-insert lock nuts to prevent this issue from occurring. Therefore, a “set it and forget it” mindset is only possible with quality hardware. Consequently, your Solar Installation stays secure for its entire 25-year lifespan.
Additionally, verify that the structure is grounded as discussed in Step 6. A metal frame on a roof is a prime target for static electricity. Furthermore, use specialized “Grounding Lugs” for a solid electrical connection between rails. Therefore, physical strength and electrical safety go hand-in-hand. This completes the structural phase of your world-class Solar Installation.
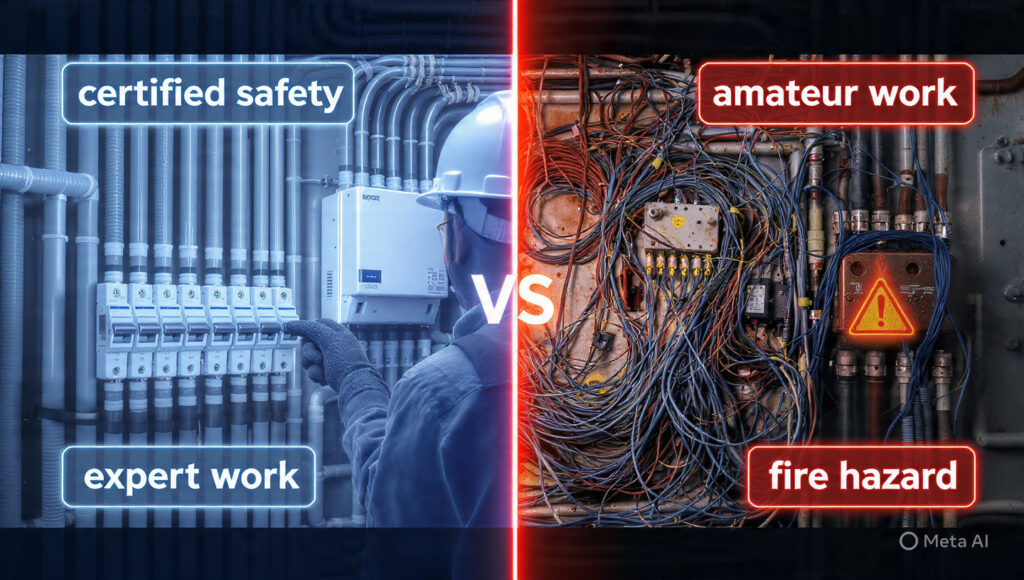
STEP 8: Choosing the Right Hands for Your Solar Installation
Firstly, the most expensive equipment can fail if installed by an amateur. Many people try to save money by hiring local, uncertified electricians. However, a Solar Installation involves high-voltage DC electricity and complex engineering. Moreover, one small mistake can lead to fire or system failure. Therefore, choosing a qualified expert is the most important decision you will make.
Why Expert Supervision is Key for Solar Installation
Initially, certified professionals understand the science of “Load Balancing” and “Voltage Drop.” Additionally, they follow strict safety protocols like wearing harnesses and using insulated tools. Consequently, they reduce the risk of accidents during your Solar Installation. Furthermore, experts provide a “Testing and Commissioning” report after the job is done. Therefore, professional supervision ensures your system meets international electrical standards.
Moreover, experts know how to handle sensitive Tier-1 solar panels properly. Standard laborers often walk on panels or drop them roughly. Firstly, these actions create micro-cracks that are invisible to the naked eye. Consequently, your Solar Installation efficiency will drop significantly over the first year. Additionally, professionals ensure that every bolt is torqued to the correct specification. Therefore, expert hands protect your long-term financial investment.
Certified Installer vs. Local Electrician
Use this comparison to understand why expertise matters for your system.
| Feature | Certified Solar Expert | Local General Electrician |
| DC Knowledge | Specialized Training | Limited / AC Focus |
| Safety Gear | Harnesses & SPD usage | Often Non-existent |
| Warranty Support | Authorized by Brand | None / Personal Guarantee |
How to Spot “Sasta” (Cheap) Material Scams
Initially, be wary of installers offering prices much lower than the market. Moreover, “cheap” often means using B-grade panels or aluminum-clad wires. These materials look identical to premium ones but fail within months. Consequently, your Solar Installation becomes a safety hazard rather than a saving tool. Therefore, always ask for the original manufacturer’s invoices for every component used.
Additionally, check the weight and finish of the mounting structure provided. Scammers often use thin, non-galvanized iron that rusts after the first rain. Furthermore, ensure the DC cables have the “TUV Certified” stamp on them. Consequently, you can be sure the insulation is truly UV-resistant and fire-retardant. Therefore, verifying the material quality is a mandatory step in your Solar Installation process.
Interviewing Your Potential Installer
Firstly, ask the installer for their previous project portfolio and client references. You should call at least two old customers to verify their work. Additionally, ask about their “After-Sales Service” policy for technical glitches. Consequently, you will know if they support you after receiving the payment. Therefore, a reputable Solar Installation company will always be transparent about its history.
Moreover, ask them specific technical questions about grounding and surge protection. A true expert will explain the difference between AC and DC breakers. Furthermore, they should provide a detailed single-line diagram (SLD) of your system. Consequently, you can see exactly how the electricity flows through your house. Therefore, technical transparency is the hallmark of a professional Solar Installation team.
Pro Fix: Post-Installation Inspection Checklist
Before releasing the final payment, perform a “Visual Audit.” Check if all wires are inside the conduits and the MC4 connectors are properly clicked. Additionally, verify that the earthing pit is moist and the LA is installed. Consequently, you prevent 90% of common operational failures. Therefore, your Solar Installation starts its journey on a safe note.
Avoiding DIY Disasters
Additionally, many enthusiasts attempt a DIY Solar Installation to save labor costs. However, working on a sloped roof with 400V DC is extremely dangerous. Furthermore, most equipment warranties are only valid if a certified technician installs them. Consequently, a DIY error could leave you with no insurance or warranty. Therefore, leave the heavy lifting to the professionals for total peace of mind.
Did You Know?
Most inverter warranties are “Void” if the system lacks proper DC Surge Protection Devices (SPD). Ignoring a $50 part can cost you a $2,000 inverter repair in your Solar Installation!
The Importance of a Service Level Agreement (SLA)
Moreover, always sign a formal contract before the work begins on-site. Firstly, the contract should specify the exact brands and models of equipment. It should also include a timeline for completion and a penalty for delays. Additionally, include a one-year “Workmanship Warranty” for the installation itself. Therefore, you are legally protected against poor service during your Solar Installation.
Furthermore, ensure the installer assists you with the “Net Metering” application process. This paperwork is often complex and requires certified electrical drawings from the firm. Consequently, a full-service provider saves you months of administrative headaches. Additionally, they should provide basic training on how to use the monitoring app. Therefore, the right partner makes your Solar Installation experience smooth and stress-free.
Finalizing Your Decision
Finally, remember that the cheapest quote is rarely the best value. Investing 10% more in a certified team pays off through better efficiency. Moreover, a well-installed system requires less maintenance over its 25-year life. Therefore, prioritize quality and certification over a “bargain” price tag. Consequently, your Solar Installation becomes a reliable source of free energy for decades.
Additionally, keep a digital copy of all receipts and warranty cards. Take photos of the wiring before the conduits are closed for future reference. Furthermore, schedule a follow-up visit three months after the installation for a checkup. Therefore, proactive management ensures your system stays in peak condition. This completes the essential guide to choosing the right team for your Solar Installation.
STEP 9: Maximizing Returns on Your Solar Installation Investment
Firstly, commissioning is the final bridge between installation and energy savings. You must verify that each component operates at peak capacity. Moreover, testing ensures your system is safe for long-term daily operation. Therefore, a thorough inspection is mandatory before you flip the switch. A successful Solar Installation relies on data, not just visual assumptions.
Essential Post-Installation Voltage Testing
First, perform a string voltage test with a multimeter. Measure the Open Circuit Voltage (Voc) of each panel string. Additionally, compare these readings with the manufacturer’s official data sheet values. Consequently, you can identify any loose connections or faulty panels immediately. Therefore, electrical testing is the first line of defense for your Solar Installation.
Furthermore, verify the polarity of all DC cables before connecting the inverter. Reverse polarity can cause permanent damage to high-end electronic components. Additionally, test the Insulation Resistance (IR) to ensure no wires are leaking current. Consequently, you prevent potential short circuits and fire hazards in the future. Therefore, meticulous testing defines the reliability of a professional Solar Installation.
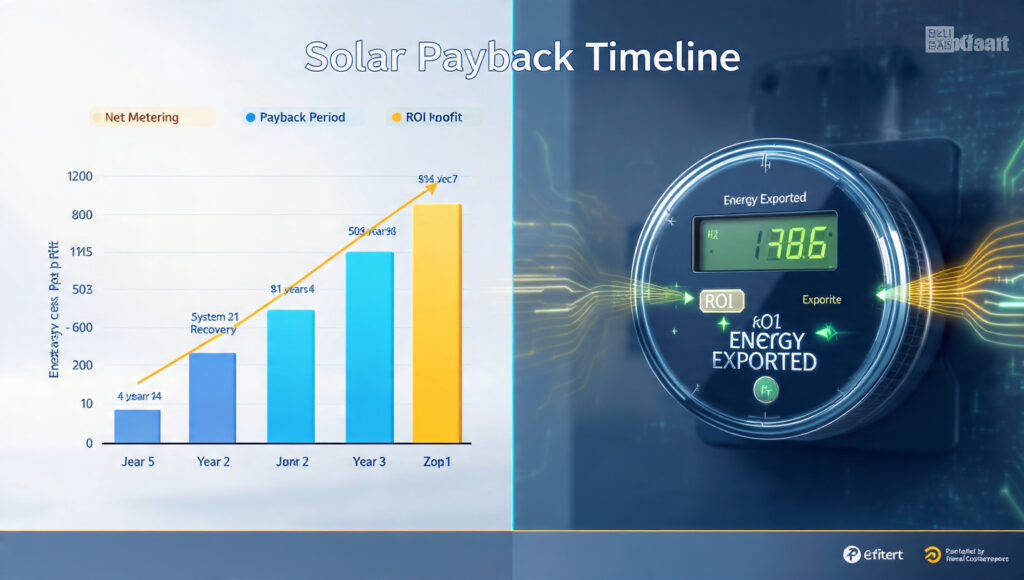
Calculating the Financial Payback of Solar Installation
Moreover, understanding your Return on Investment (ROI) is crucial for financial planning. Firstly, calculate the total cost of the system, including equipment and labor. Subtract any government subsidies or tax credits available in your region. Additionally, divide this net cost by your average monthly utility savings. Consequently, you will find the exact number of months for the “Payback Period.”
Most modern systems reach their break-even point within three to five years. Furthermore, the electricity produced after this period is essentially free of cost. Therefore, a Solar Installation acts as a high-yield long-term financial asset. Additionally, consider the rising costs of traditional grid power in your calculations. Consequently, your savings will likely increase as utility rates continue to climb globally.
ROI Timeline and Payback Comparison Table
Use this table to estimate your financial journey with solar energy.
| Region | Average System Cost | Monthly Savings | Estimated Payback |
| High Sunlight (MENA/Asia) | $4,000 – $7,000 | $150 – $250 | 3 – 4 Years |
| Moderate Sunlight (USA/EU) | $12,000 – $18,000 | $100 – $200 | 6 – 8 Years |
| Low Sunlight (UK/North) | $8,000 – $12,000 | $60 – $100 | 9 – 11 Years |
The Power of Net Metering Technology
Moreover, Net Metering allows you to sell excess energy back to the grid. Firstly, your utility company installs a bi-directional smart meter at your home. This meter tracks both the energy you consume and the energy you export. Additionally, you receive credits on your bill for every unit sent back. Therefore, Net Metering significantly accelerates the ROI of your Solar Installation.
However, the application process for Net Metering can take several weeks. You must submit certified electrical drawings and safety certificates to the utility. Additionally, ensure your inverter is on the government’s approved equipment list. Consequently, you avoid administrative delays and start earning credits much sooner. Therefore, early planning for Net Metering is vital for your Solar Installation success.
Pro Fix: Verifying Net Metering Billing
Check your first utility bill carefully after activating Net Metering. Ensure the “Export” units match the data on your solar monitoring app. Occasionally, utility companies fail to sync the new meter with their billing software. Consequently, you might lose money on exported energy. Therefore, regular monitoring protects your Solar Installation revenue.
Understanding System Degradation and Performance
Additionally, you must account for the natural aging of solar components. Most panels lose approximately 0.5% of their efficiency every single year. Furthermore, inverters may require a component refresh after twelve to fifteen years. Consequently, your financial model should include a small margin for future maintenance. Therefore, a realistic outlook ensures the long-term viability of your Solar Installation.
Did You Know?
Premium N-Type panels have a much lower degradation rate of 0.4% annually. This means your Solar Installation will still produce 87% of its original power after 30 years!
Monitoring Your Yield for Maximum ROI
Moreover, use your inverter’s mobile app to track daily energy production. Firstly, look for the “Specific Yield,” which is kWh produced per kW installed. Compare this data with local weather reports to ensure the system is healthy. Additionally, sudden drops in production usually indicate dust buildup or shading issues. Therefore, active monitoring is the key to maintaining a high-performance Solar Installation.
Furthermore, some advanced apps offer “Consumption Monitoring” as an extra feature. This helps you shift heavy loads like washing machines to peak sunlight hours. Consequently, you use your own solar power instead of buying from the grid. Additionally, this “Self-Consumption” strategy offers the highest financial benefit for homeowners. Therefore, changing your habits can further optimize your Solar Installation ROI.
Final Commissioning Checklist
Finally, perform a formal “Handover” with your installation team on site. Firstly, verify that all circuit breakers are labeled correctly in the panel. Ensure the system shuts down safely during a simulated grid power failure. Additionally, collect all warranty cards and technical manuals for your records. Therefore, a documented commissioning process provides peace of mind for your Solar Installation.
Additionally, ask for a demonstration of the emergency shutdown switch (Rapid Shutdown). This feature is critical for firefighters in case of a house emergency. Furthermore, ensure the grounding connections are checked one last time with a meter. Consequently, you are 100% sure that the system is both profitable and safe. Therefore, this final step completes the engineering phase of your Solar Installation.
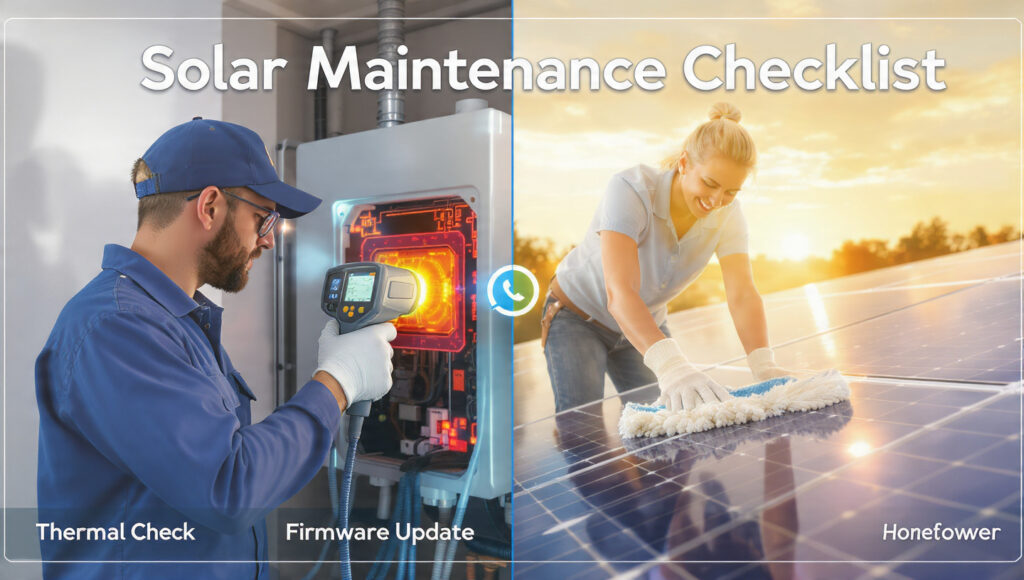
STEP 10: Preserving Peak Performance for Your Solar Installation
Firstly, maintenance ensures your system survives its full twenty-five-year life expectancy. Many homeowners believe solar panels are entirely “set and forget” devices. However, environmental factors like dust and bird droppings can reduce efficiency. Moreover, a neglected system may lose 20% of its power output. Therefore, a consistent maintenance routine is vital for a healthy Solar Installation.
The Science of Solar Panel Cleaning
Initially, you must understand how “soiling” affects your energy production. Dust creates a thin layer that blocks photons from reaching the cells. Additionally, bird droppings can cause “hot spots” that permanently damage the glass. Consequently, regular cleaning is the simplest way to boost your yield. Therefore, you should inspect your Solar Installation every two weeks for dirt.
Furthermore, always use soft materials to clean the delicate glass surfaces. Avoid using harsh chemicals or abrasive brushes that cause micro-scratches. Initially, rinse the panels with plain water to remove loose grit. Additionally, use a soft microfiber mop for stubborn stains or grime. Consequently, your Solar Installation glass remains clear and highly transmissive for sunlight.
Simple Maintenance Tips for Your Solar Installation
Moreover, hardware checks are just as important as cleaning the glass. Firstly, inspect the mounting structure for any loose bolts or rust. High winds can slowly vibrate fasteners over several years of operation. Additionally, ensure the conduits are still watertight and firmly attached to walls. Therefore, physical integrity is the backbone of a safe Solar Installation.
Consequently, you should also check the surrounding vegetation for new shadows. Trees grow faster than most people realize during the spring season. Furthermore, trim any branches that cast even a small shadow on panels. Additionally, monitor the monitoring app for any sudden production dips. Therefore, being proactive prevents minor issues from ruining your Solar Installation ROI.
Cleaning Method Effectiveness Table
Use this table to choose the safest and most efficient cleaning strategy.
| Method | Water Usage | Effectiveness | Risk Level |
| Rainwater Only | Zero | Low (Leaves dust) | Low |
| Soft Mop + Water | Moderate | High (Removes films) | Low |
| Pressure Washer | High | Very High | High (Glass Crack) |
Maintaining the Inverter and Electronics
Firstly, the inverter requires a dust-free environment to operate its fans. Dust buildup can clog the intake vents and cause internal overheating. Moreover, overheating leads to a shorter lifespan for the electronic capacitors. Consequently, you should wipe the inverter exterior with a dry cloth monthly. Therefore, air circulation remains optimal for your Solar Installation brain.
Furthermore, check the firmware version of your smart inverter regularly. Manufacturers release updates to improve energy tracking and security protocols. Additionally, these updates can fix known software bugs or communication errors. Consequently, keeping your software current maximizes the intelligence of your Solar Installation. Therefore, digital maintenance is just as critical as physical cleaning today.
Pro Fix: The Early Morning Cleaning Rule
Never clean your panels during the hot afternoon sun. Pouring cold water on 70°C glass can cause a “Thermal Shock” crack. Consequently, you should only clean panels at dawn or late evening. Therefore, your Solar Installation glass stays safe from sudden temperature changes and cracks.
Managing Long-Term Battery Health
Additionally, battery terminals require periodic inspection for any signs of oxidation. White or green crust on the terminals increases electrical resistance. Furthermore, this resistance generates heat and reduces the charging efficiency significantly. Consequently, clean the terminals and apply a thin layer of petroleum jelly. Therefore, your Solar Installation battery bank stays healthy and highly conductive.
Did You Know?
New “Self-Cleaning” hydrophobic coatings can shed 90% of dust automatically. Applying this coating can reduce your Solar Installation cleaning frequency from monthly to twice a year!
Annual Professional Safety Audits
Moreover, hire a certified technician for a deep “Health Audit” annually. Firstly, they will use thermal cameras to find hidden hot spots. These cameras detect loose connections that the human eye cannot see. Additionally, the technician will verify the earthing resistance with specialized meters. Therefore, professional audits ensure the total safety of your Solar Installation.
Furthermore, ask the technician to check the torque on all electrical terminals. Over time, heat expansion and contraction can loosen copper wire connections. Consequently, tight terminals prevent arcing and potential fire hazards in breakers. Additionally, replace any UV-damaged cable ties that have become brittle. Therefore, small hardware updates keep your Solar Installation looking and performing like new.
Finalizing Your Maintenance Logbook
Finally, maintain a simple logbook of all your maintenance activities. Record the dates of cleaning, firmware updates, and professional inspections. Moreover, this documentation is invaluable if you ever need to file a warranty claim. Consequently, manufacturers see that you have cared for the equipment properly. Therefore, a logbook is the final piece of a successful Solar Installation strategy.
Additionally, enjoy the peace of mind that comes with a well-maintained system. Your efforts protect your family’s safety and your financial future. Furthermore, share your maintenance tips with neighbors to build a greener community. Consequently, everyone benefits from more efficient and safer renewable energy systems. Therefore, your Solar Installation journey ends with mastery and long-term energy freedom.
Conclusion: Your Journey to Energy Sovereignty
The decision to transition to solar energy is more than just a financial investment; it is a commitment to sustainable living and long-term energy independence. Throughout this ultimate guide, we have navigated the intricate steps of a professional Solar Installation—from the initial energy audit and high-efficiency hardware selection to global safety standards and long-term maintenance.
By following these ten steps, you have moved beyond the common pitfalls that plague many DIY enthusiasts and budget-conscious homeowners. You now understand that a successful Solar Installation is built on the pillars of quality components, precise engineering, and unwavering adherence to safety protocols. Whether you are installing a small off-grid system or a massive grid-tied array, the principles remain the same: Quality over cost, and safety over speed.
The sun provides enough energy in a single hour to power the entire world for a year. With your newly acquired knowledge, you are now ready to harvest that power efficiently, safely, and profitably.
Solar Installation: Frequently Asked Questions
A high-quality Solar Installation is designed to last between 25 to 30 years. Most Tier-1 solar panels come with a 25-year performance warranty, while modern hybrid inverters typically last 10-15 years before requiring a component refresh.
Yes. Real estate data worldwide shows that a certified Solar Installation increases home value by an average of 4.1%. In many markets, solar-equipped homes sell significantly faster than those relying solely on the grid.
The leading cause of failure is poor wiring and substandard DC connectors. Using non-certified MC4 connectors or undersized cables leads to overheating and fire hazards. Always prioritize high-quality DC protection during your Solar Installation.
Solar panels do not need direct sunlight to produce electricity; they use photons from ambient light. While production drops to 10%-25% of its peak capacity on very cloudy days, your Solar Installation will still generate power during daylight hours.
For most environments, cleaning your panels once a month is sufficient. However, if you live in a dusty area or near a high-traffic road, a bi-weekly cleaning schedule will help your Solar Installation maintain peak performance and ROI.
Anti-islanding is a global safety standard that ensures your inverter shuts down when the grid goes out. This prevents your Solar Installation from feeding electricity back into the lines, protecting utility workers from accidental electrocution.
Absolutely. Provided your inverter capacity (kW) and battery bank are sized correctly, a modern Solar Installation can easily handle heavy loads like air conditioners, refrigerators, and electric pumps.
Net Metering policies vary by country and utility provider. Most developed energy markets offer Net Metering, allowing you to export excess energy from your Solar Installation to the grid in exchange for billing credits.
View Article Sources
- Technical Data International Energy Agency (IEA): Solar PV Global Report
- Safety Standard National Electrical Code (NEC): Solar Safety & Rapid Shutdown Requirements
- Research National Renewable Energy Laboratory (NREL): Best Research-Cell Efficiency Data
- Compliance International Electrotechnical Commission (IEC): PV Quality & Testing Standards
- Hardware Guide EnergySage: In-depth Analysis of Solar Cell Technologies
Note: Eco Power Guide prioritizes peer-reviewed studies and official regulatory documentation to ensure the highest accuracy in every Solar Installation guide we publish.